This tutorial introduces several key concepts:

  • Creating a container image
  • Running a custom ML model
  • Developing your app using Beam’s live reloading workflow
  • Pre-loading models and caching them in storage volumes
  • Autoscaling and concurrency

Setup your app

You’ll start by adding an endpoint decorator with an Image

  • Endpoint is the wrapper for your inference function.
  • Inside the endpoint is an Image. The Image defines the image your container will run on.

If you’d like to make further customizations to your image — such as adding shell commands — you can do so using the commands argument. Read more about custom images.

from beam import Image, endpoint


@endpoint(
    cpu=1,
    memory="16Gi",
    gpu="T4",
    image=Image(
        python_version="python3.9",
        python_packages=[
            "transformers",
            "torch",
        ], # These dependencies will be installed in your remote container
    ),
)

Running a custom ML model

We’ll create a new function to run inference on facebook/opt-125m via Huggingface Transformers.

Since we’ll deploy this as a REST API, we add a endpoint() decorator above the inference function:

from beam import Image, endpoint


@endpoint(
    cpu=1,
    memory="16Gi",
    gpu="T4",
    image=Image(
        python_version="python3.9",
        python_packages=[
            "transformers",
            "torch",
        ],
    ),
)
def predict(prompt):
    from transformers import AutoTokenizer, OPTForCausalLM

    model = OPTForCausalLM.from_pretrained("facebook/opt-125m")
    tokenizer = AutoTokenizer.from_pretrained("facebook/opt-125m")

    # Generate
    inputs = tokenizer(prompt, return_tensors="pt")
    generate_ids = model.generate(inputs.input_ids, max_length=30)
    result = tokenizer.batch_decode(
        generate_ids, skip_special_tokens=True, clean_up_tokenization_spaces=False
    )[0]

    print(result)

    return {"prediction": result}

Developing your app on Beam

Beam includes a live-reloading feature that allows you to run your code on the same environment you’ll be running in production.

By default, Beam will sync all the files in your working directory to the remote container. This allows you to use the files you have locally while developing. If you want to prevent some files from getting uploaded, you can create a .beamignore.

In your shell, run beam serve app.py:predict. This will:

  1. Spin up a container
  2. Run it on a GPU
  3. Print a cURL request to invoke the API
  4. Stream the logs to your shell

You should keep this terminal window open while developing.

(.venv) user@MacBook demo % beam serve app.py:predict
=> Building image
=> Using cached image
=> Syncing files
=> Invocation details

curl -X POST \
'https://app.beam.cloud/endpoint/id/bc55068e-b648-4dbc-9cb7-183e1789e011' \
    -H 'Accept: */*' \
    -H 'Accept-Encoding: gzip, deflate' \
    -H 'Connection: keep-alive' \
    -H 'Authorization: Bearer [YOUR_AUTH_TOKEN]' \
    -H 'Content-Type: application/json' \
    -d '{}'

=> Watching ./inference-app for changes...

Now, head back to your IDE, and change a line of code. Hit save.

If you look closely at the shell running beam serve, you’ll notice the server reloading with your code changes.

You’ll use this workflow anytime you’re developing an app on Beam. Trust us — it makes the development process uniquely fast and painless.

Performance Optimizations

If you called the API via the cURL command, you’ll notice that your model was downloaded each time you invoked the API.

In order to improve performance, we’ll setup a function to pre-load your models and store them on disk between API calls.

Pre-loading

Beam includes an on_start method, which you can pass to your function decorators. on_start is run exactly once when the container first starts:

The value of the on_start function can be retrieved from context.on_start_value:

from beam import Image, endpoint


def download_models():
    from transformers import AutoTokenizer, OPTForCausalLM

    model = OPTForCausalLM.from_pretrained("facebook/opt-125m")
    tokenizer = AutoTokenizer.from_pretrained("facebook/opt-125m")

    return model, tokenizer


@endpoint(
    on_start=download_models,
    image=Image(
        python_version="python3.9",
        python_packages=[
            "transformers",
            "torch",
        ],
    ),
)
def predict(context):
    # Retrieve cached model fron on_start function
    model, tokenizer = context.on_start_value

    # Do something with the model and tokenizer...

Cache in a storage volume

The on_start method us from having to download the model multiple times, but we can avoid downloading the model entirely by caching it in a Storage Volume:

Beam allows you to create highly-available storage volumes that can be used across tasks. You might use volumes for things like storing model weights or large datasets.

from beam import Image, endpoint, Volume


# Model weights will be cached in this folder
CACHE_PATH = "./weights"


# This function runs once when the container first starts
def download_models():
    from transformers import AutoTokenizer, OPTForCausalLM

    model = OPTForCausalLM.from_pretrained("facebook/opt-125m", cache_dir=CACHE_PATH)
    tokenizer = AutoTokenizer.from_pretrained("facebook/opt-125m", cache_dir=CACHE_PATH)

    return model, tokenizer


@endpoint(
    on_start=download_models,
    volumes=[Volume(name="weights", mount_path=CACHE_PATH)],
    cpu=1,
    memory="16Gi",
    gpu="T4",
    image=Image(
        python_version="python3.9",
        python_packages=[
            "transformers",
            "torch",
        ],
    ),
)

Now, these models can be automatically downloaded to the volume by using the cache_dir argument in transformers:

model = OPTForCausalLM.from_pretrained("facebook/opt-125m", cache_dir=CACHE_PATH)
tokenizer = AutoTokenizer.from_pretrained("facebook/opt-125m", cache_dir=CACHE_PATH)

These volumes are mounted directly to the container running your app, so you can read and write them to disk like any normal file.

Configure Autoscaling (Optional)

You can control your autoscaling behavior with QueueDepthAutoscaler.

QueueDepthAutoscaler takes two parameters:

  • max_containers
  • tasks_per_container
from beam import endpoint, QueueDepthAutoscaler


@endpoint(autoscaler=QueueDepthAutoscaler(max_containers=5, tasks_per_container=1))
def function():
    pass

Deployment

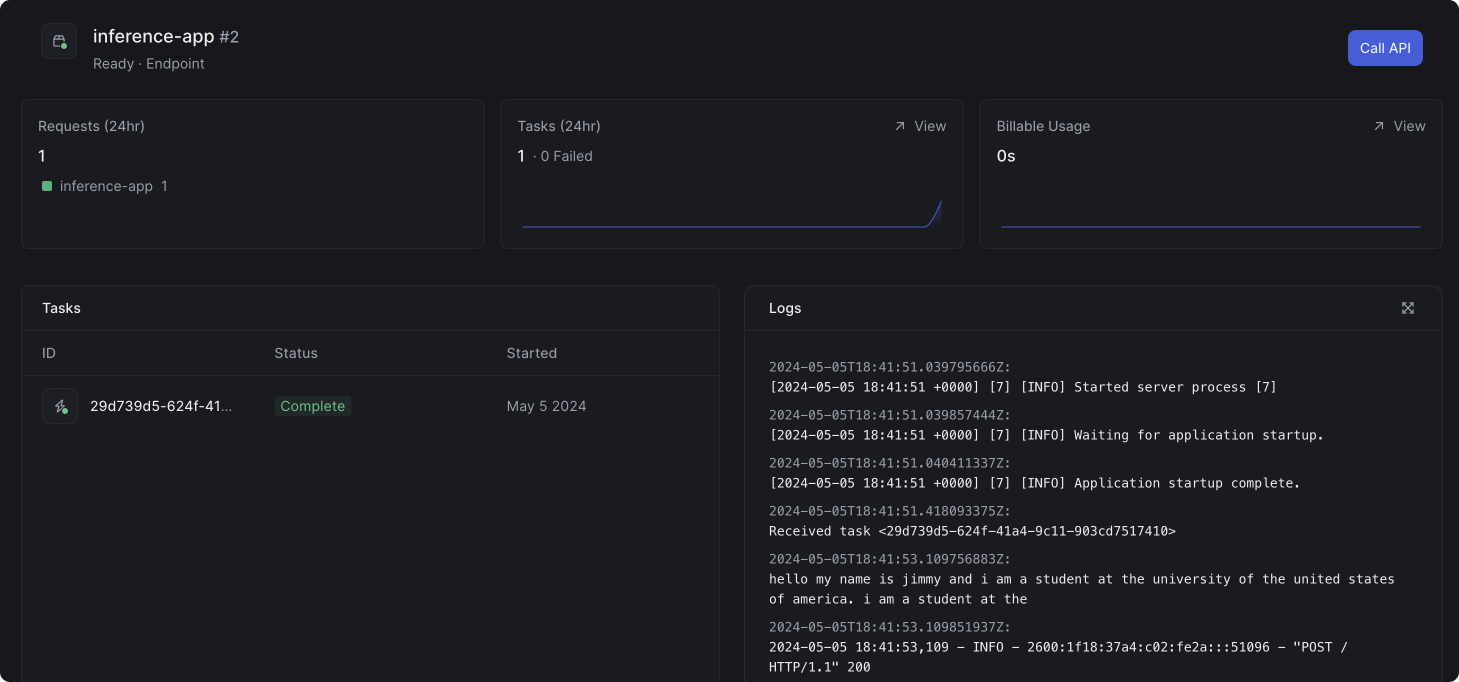
With these performance optimizations in place, it’s time to deploy your API to create a persistent endpoint. In your shell, run this command to deploy your app:

beam deploy app.py:predict --name inference-app

Monitoring Logs and Task Status

In the dashboard, you can view the status of the task and the logs from the container:

Summary

You’ve successfully created a highly performant serverless API for your ML model!