Why Beam?
Beam’s Petri Net framework is ideal for workflows that require concurrency and scalability. This app uses Beam to:- Retrieve Google Shopping URLs for a product name you provide to the bot.
- Scrape review pages for those products.
- Summarize reviews into a report.
Pre-requisites
You’ll need three API keys to run the example below:- Firecrawl API key (free), used for scraping product pages
- SerpApi API key (free for 100 searches a month), used to retrieve Google Shopping URLs
- OpenAI API Key
.env file in your project directory.
Setup
Defining Locations
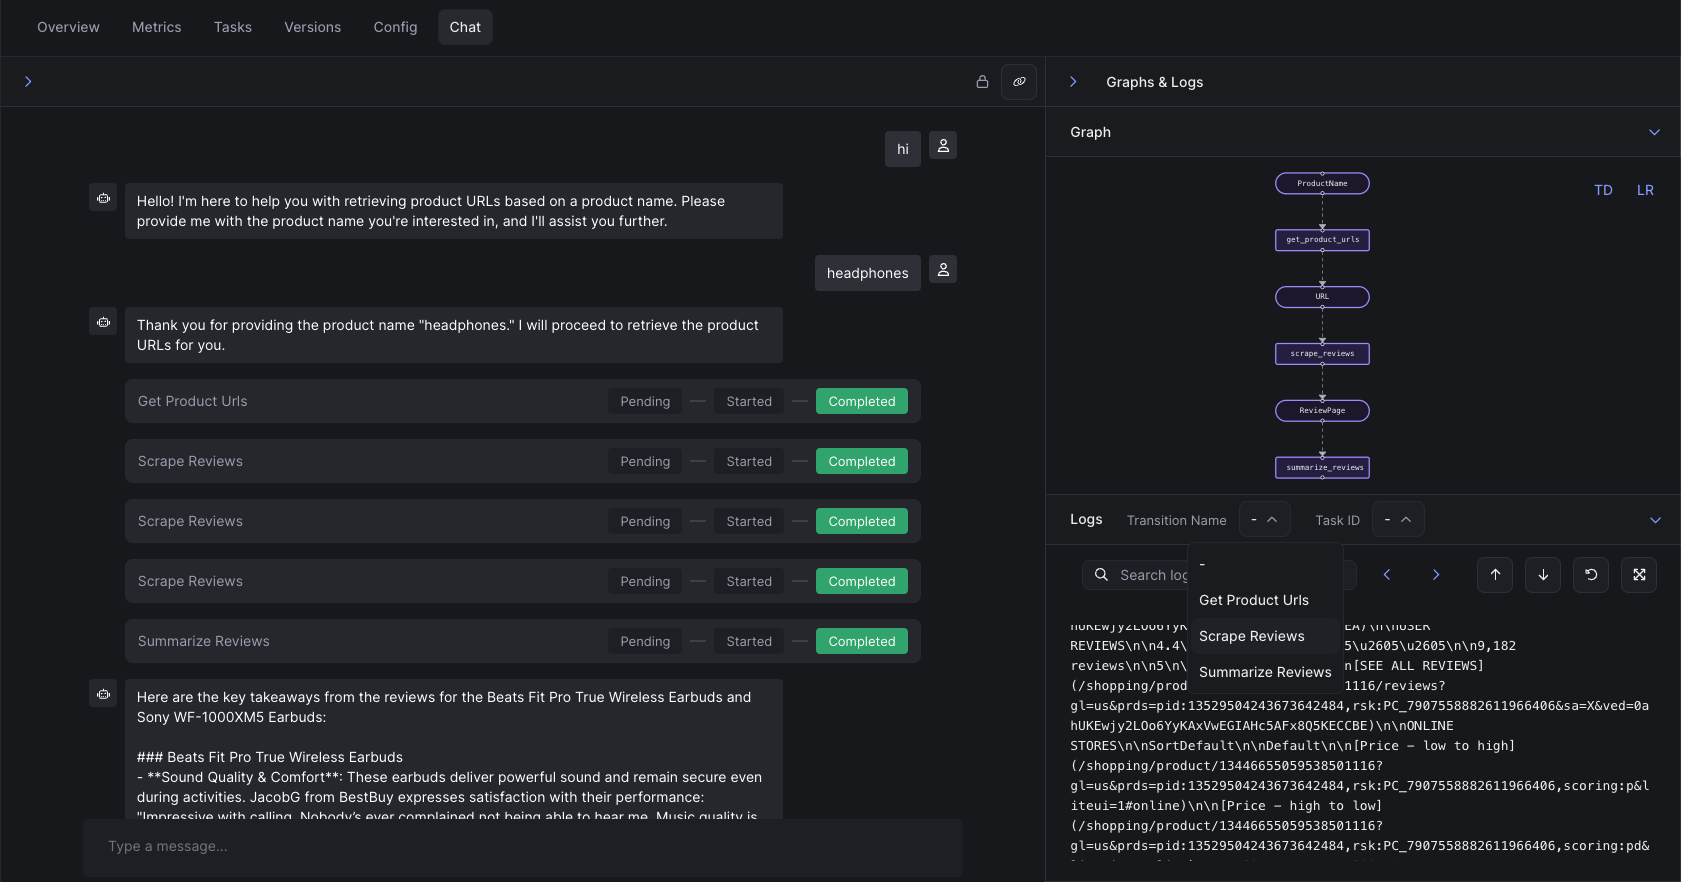
Locations represent the states of data flowing through the network. In this app, we’ll use three states:- ProductName: The product to search for (i.e. “headphones”)
- URL: URLs of product pages retrieved from Google Shopping
- ReviewPage: Online product pages with customer reviews
Create the Bot
Let’s setup the bot, which is what manages the workflow. Add your API keys and define the locations (states) it will manage.Adding Transitions
Transitions are events or actions in your bot, triggered by changes to the locations (state).Retrieve Product URLs
The first transition takes a product category (e.g., “headphones”) and uses SerpAPI to retrieve Google Shopping URLs for the product.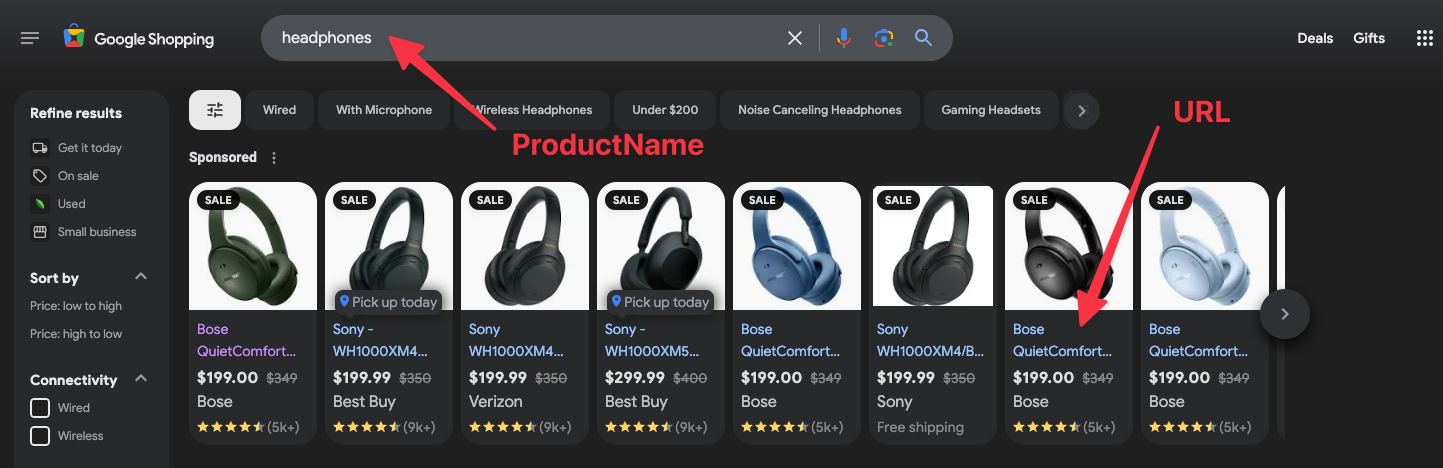
Scrape Review Pages
The second transition scrapes review pages from each product URL using Firecrawl.Summarize Reviews
The final transition summarizes reviews from all the scraped pages into a markdown file. Pay close attention to theinputs field below. This transition will not begin running until 3 ReviewPage markers have been created from the previous transition.
ReviewPage markers have been emitted.
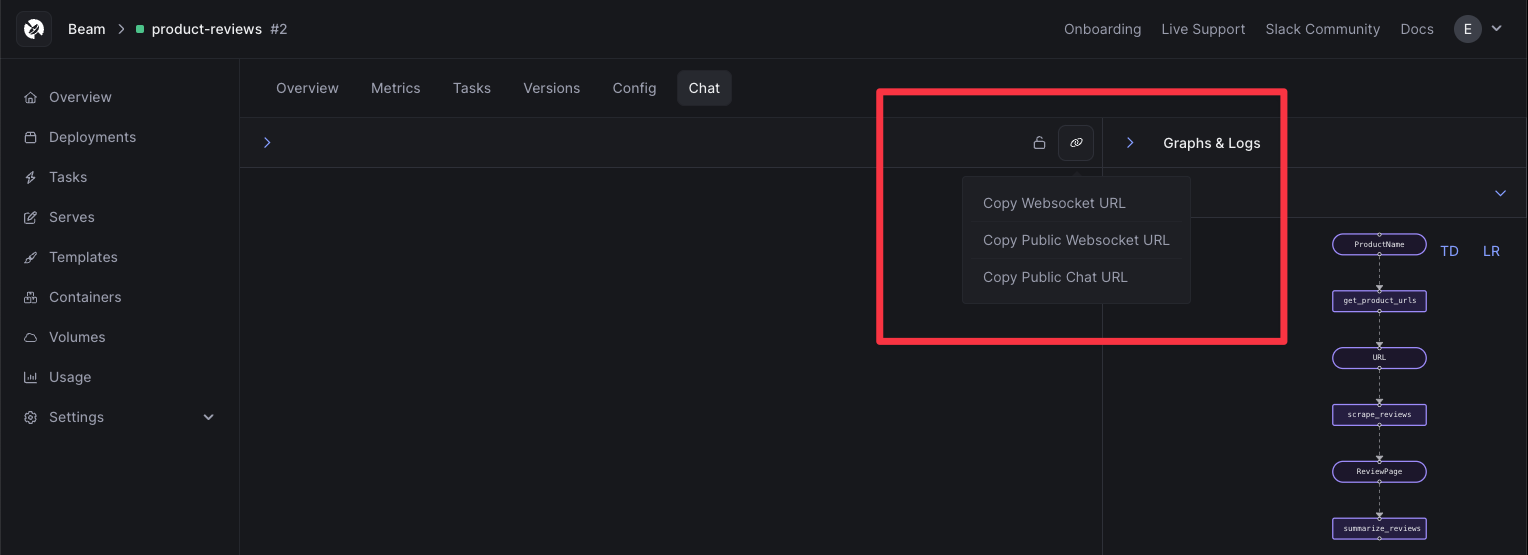
Deploying the Bot
What’s next?
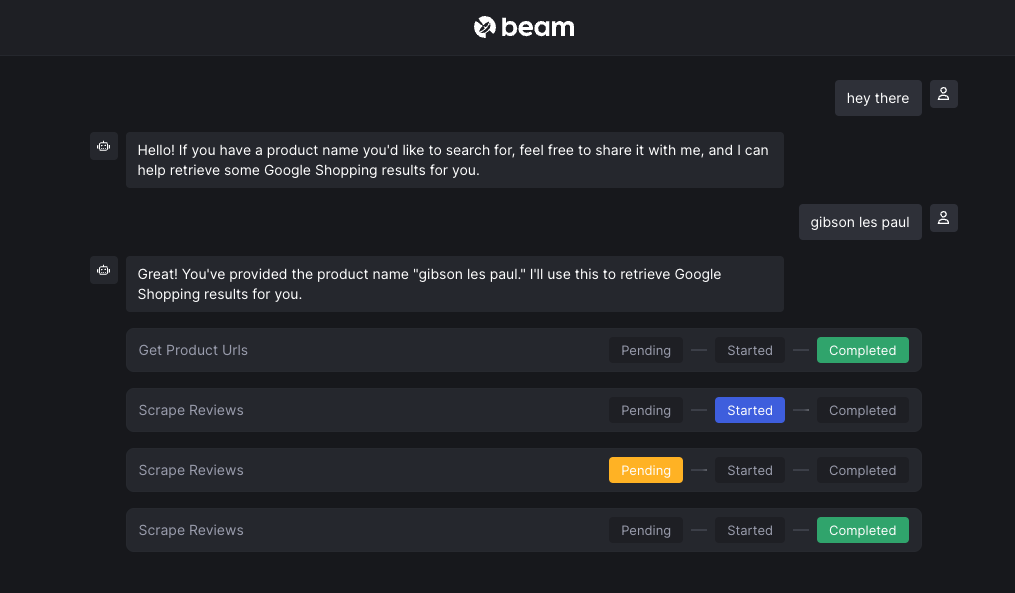
With the bot deployed, there are a few things you can try:Create a Public Chat Page
You can create a public, sharable Chat Page for your bot by adding anauthorized=False argument to the bot:
Add Interactivity
We provide a number of helper commands using a class calledcontext.
Context variables can be used for prompting the user for input, creating blocking requests to the bot, and sending message to the user.
Available Commands
View The Code
You can see the full code for this example below.View The Code
View The Code